Follow the setup on each computer. Share a direct link to any step with the person you are helping.
Create your account
On your own computer, create a Screensie account. You will use it in the website, Screensie Client, and Manager. The Free plan lets you test your first connection.
Select Create an account on the Screensie home page.
Enter your name, email, and an account password. Follow the verification instructions shown after registration.
Keep your account password private. It is different from the remote PC's connection password.
On the computer receiving support, download the package for its operating system. Run the installer and approve the operating system's installation prompt.
For Windows, run screensieinstaller.exe.
The normal Windows installation includes remote access and Command Center administration.
Open Advanced options only if you need a different installation path, account email/group, or a static device password. You may also exclude Command Center there if you do not need its administration tools.
Finish the installation and open Screensie.
Installing on Linux instead?
On Ubuntu or Debian, download the .deb package, open it with Software Install and click Install. Enter your administrator password, then open Screensie from the application menu.
The screensielinuxsetup.run installer is also available for command-line deployment. In a terminal opened in its download folder, run:
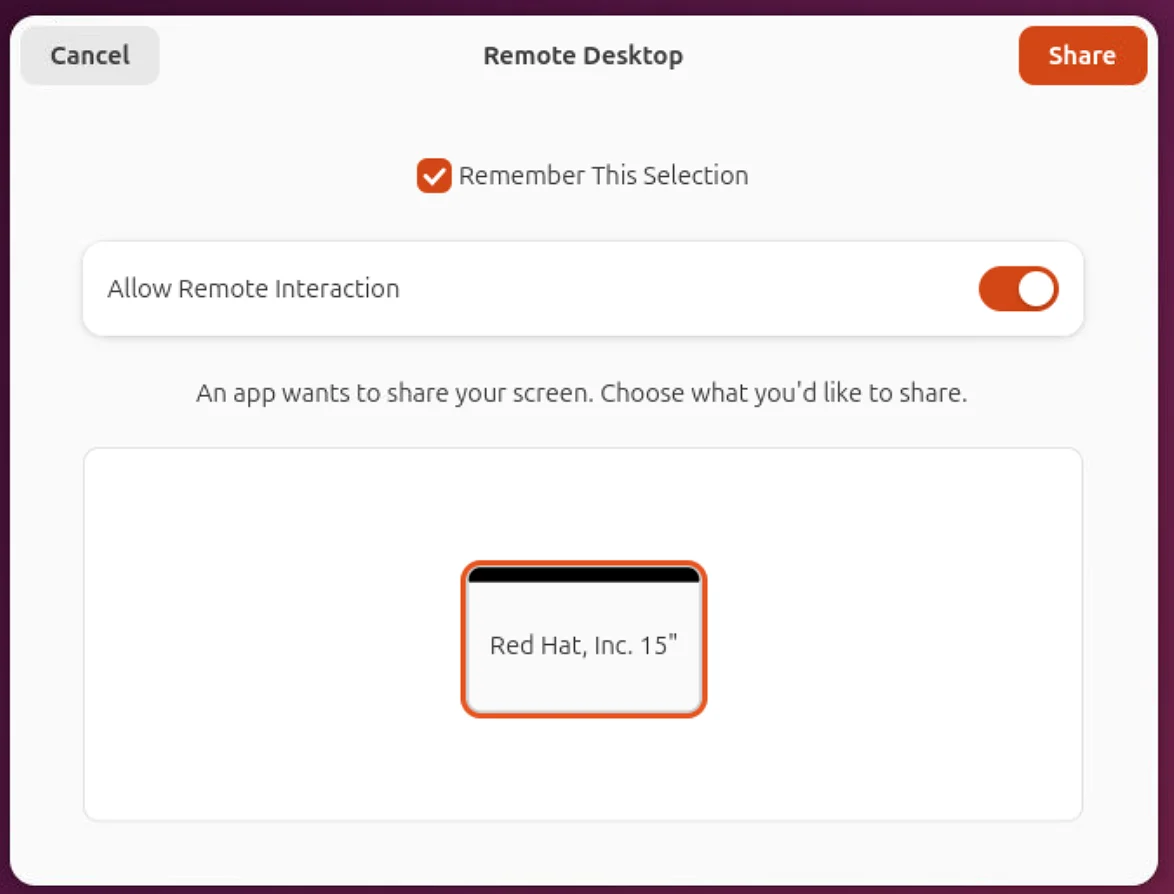
Use the actual downloaded filename if your browser renamed it. Follow the installer's prompts. Linux uses its own installer, not the Windows Advanced options screen. On Wayland, approve sharing and input on the first connection. Follow the Wayland screenshot walkthrough and test access before leaving the PC unattended.
The separate Manager dashboard app is not needed on every remote PC. Monitoring is included with the regular Screensie installation.
Set the remote PC's access
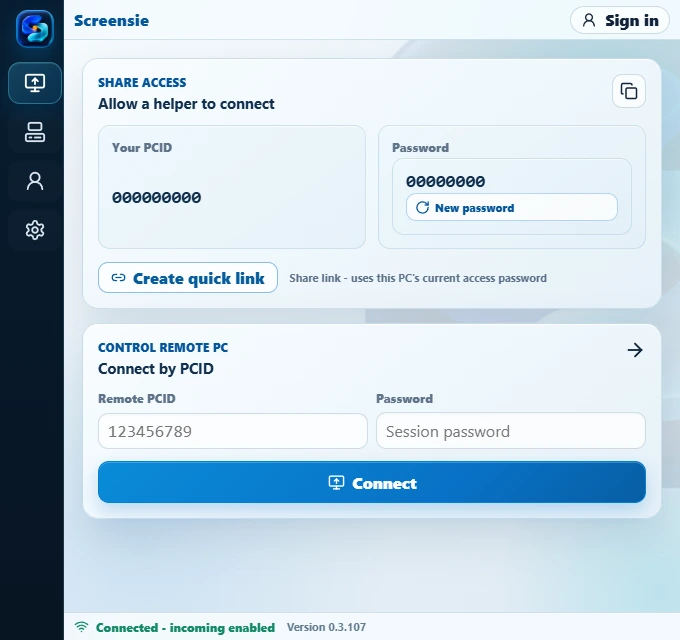
On the computer receiving support, choose a rotating password for a support visit or a private password for repeat access.
Demo only. These all-zero details cannot connect.
For an attended support visit: use Share access to find the PCID and rotating password. Give them only to the person you trust to help, or use Create quick link.
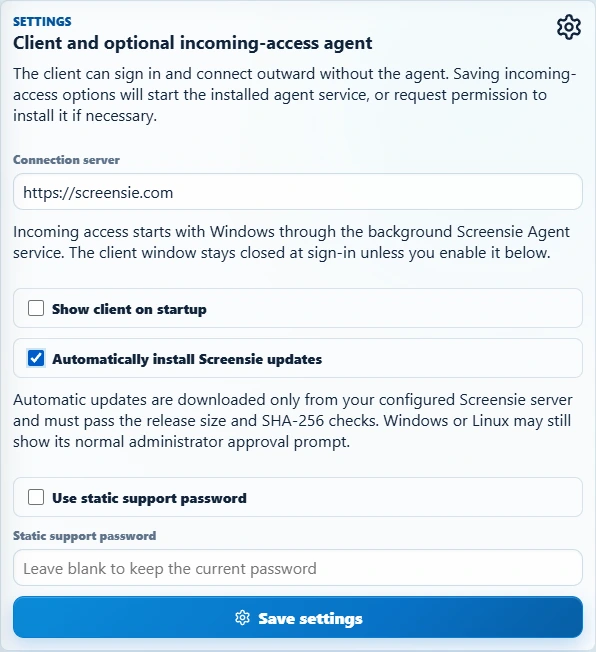
For repeat access: open the Client's Settings, select Use static support password, enter a strong Static support password, and select Save settings. You can also set it during Windows installation under Advanced options.
A private/static password is not the random password displayed for sharing. Do not put it in screenshots or public messages. Keep it in a password manager and use it only for authorized connections.
Confirm the PC is online and incoming access is enabled. It must remain powered on, connected, and have the required desktop permissions.
Set up your own PC
Download and install Screensie on your own PC, then open it.
Select Sign in and use your Screensie account.
If you have a subscription, check the outbound seat assignment in your account dashboard. Seats belong to computers you connect from, not each remote PC.
You do not have to sign every customer's PC into your own account just to connect by PCID and an authorized connection password.
Never install remote-access software or share access because an unexpected caller says your bank account or computer is in danger.
Save the remote computer
On your own computer, open Screensie Client to add the remote PC to your list.
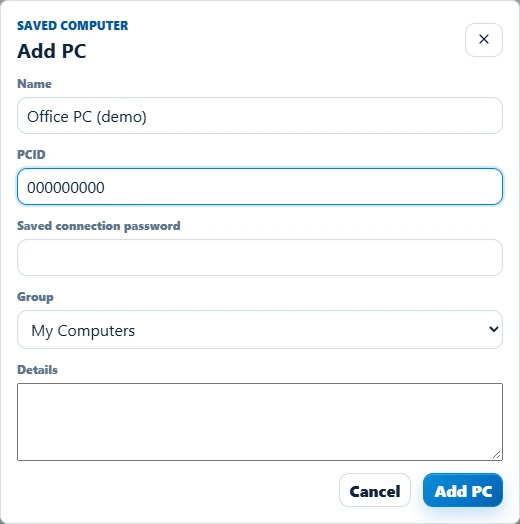
Add PC, with demo details only.
Open the computer-list view and select PC to open Add PC.
Enter a recognizable Name and the remote computer's PCID.
Enter its authorized connection password in Saved connection password. For repeat access, use the private password configured on that remote PC.
Choose a Group, add any useful details, and select Add PC.
You can also skip saving: enter the remote PCID and password under Control remote PC for a direct connection.
A rotating password may change. Saving an old rotating password does not turn it into a permanent credential.
Open a support session
From Screensie Client on your own computer, choose Remote Control or Command Center for the saved PC.
Remote Control: open the saved PC to start a remote session, or use Connect with its PCID and password. Complete any access or operating-system permission prompts.
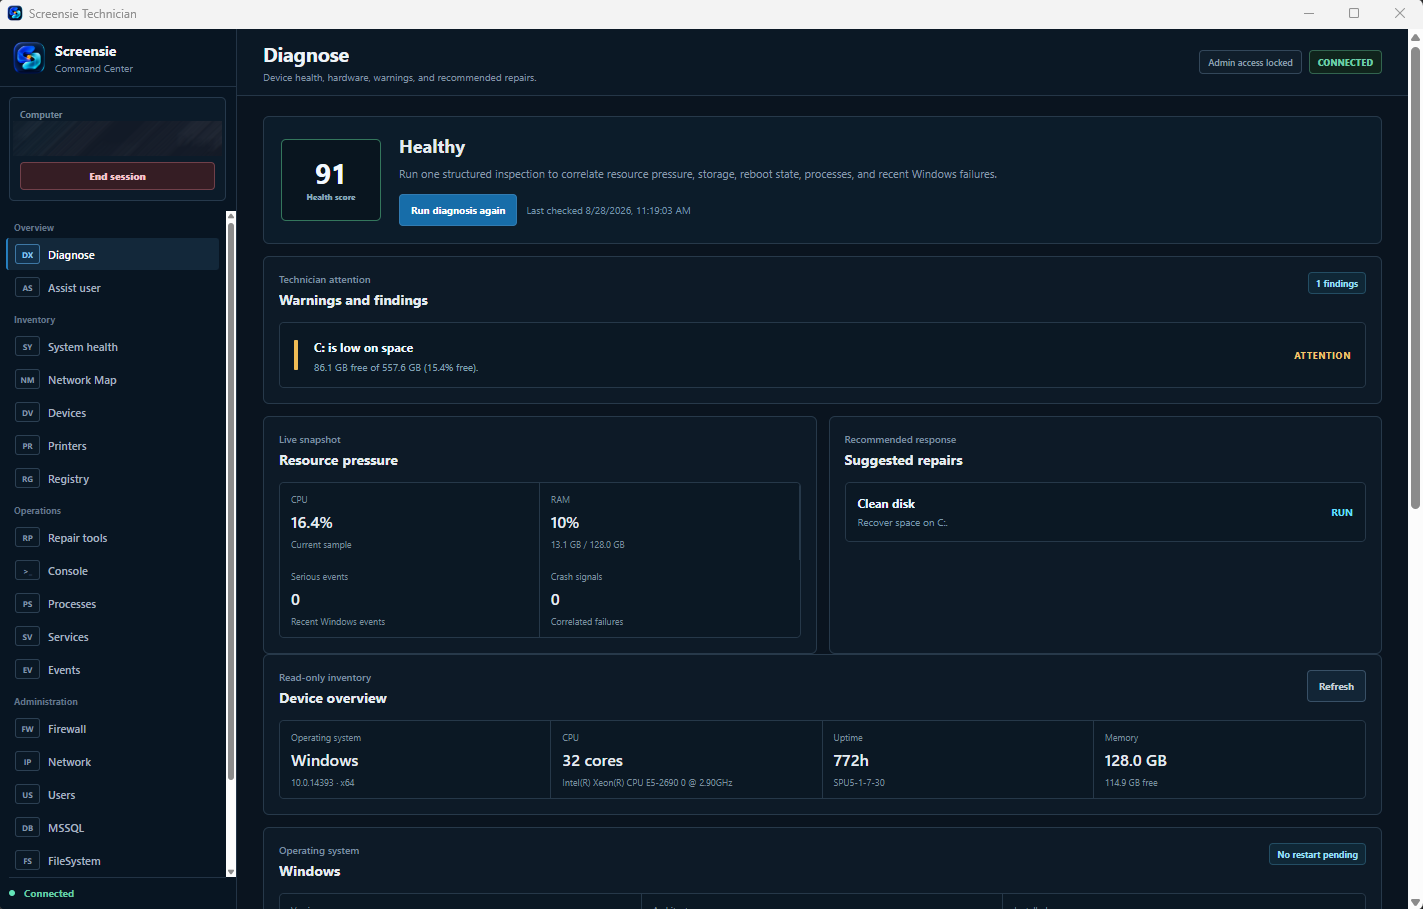
Command Center: open the saved computer's menu and choose Command Center. Start with Diagnose, then follow findings into tools such as Processes, Services, or the file browser. The remote installation must include Command Center and grant the requested access.
If the first connection does not work
Check that the PC is online, the installed versions are current, and you entered that PC's connection password rather than your account password. On Wayland, approve sharing and input on the remote desktop first. See the Wayland setup walkthrough. A sleeping or locked-down PC is not the same as an available session.
For Command Center, check that its administration component was not excluded during installation. Contact support@screensie.com with the error and version numbers, never passwords.
Use Manager on your management computer. Every active subscription includes access automatically.
Sign in to your Screensie website dashboard with an actively subscribed account.
Open Manager, or download its separate app from the signed-in dashboard.
Use your existing computer list and groups. Current supported agents send monitoring reports through the normal Screensie installation.
Choose a grouped list or the thumbnail view. Screenshots follow each PC's capability, configured interval, and operating-system permissions.
A PC marked as awaiting a report has not yet supplied current monitoring data. Check its online state and installed version instead of assuming it is healthy.
 ScreensieAccount dashboard